Annotation Menu
Annotations
The Annotations Submenu is displayed on the top of the screen and provides quick access to the end users most commonly used tools:

The tools displayed typically reflect the most common ones used by the end user so the actual order of the annotations tools on the users device will more than likely vary than from those shown above.
The tools are also grouped based around the type of annotation tool that they represent, the options include: * Annotate * Shapes * Insert
The intent of the following section is to highlight the features/options for each of the annotation tools available within Docs On Tap. It is not intended to cover the use case for each of the tools as this will be dependent upon the preferences of the individual user.
 By selecting the icon required the end user is able to apply the annotation tool to the page that is currently been viewed.
Note, the selected icon will show as greyed out when it is active and the end user will be able to continue to apply the annotation type to the current page. To end the use of the tool type tap on the greyed-out icon to end the annotation process, or tap on another tool type to continue annotating the current page. To navigate to the next page the annotation tool has to be inactive. The simplest way to do this is to click on the Pan Tool.
Free Hand Tool  
When this tool is selected by tapping or clicking on the free hand tool icon, the user is able to select from the most recently used colours for the free hand tool:

Note that the first colour is selected as the default option and that the selected colour has a sub menu accessible by clicking on the expand icon shown highlighted below which will present the user with the additional options available for this tool:

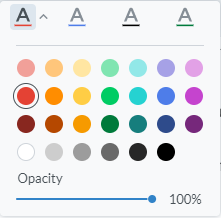
The colour palette enables you to select from the options provide.
Opacity Setting – this setting determines the depth of the colour applied to the annotation applied using this tool. The following examples highlight the impact of the settings: The Opacity used is 100%, 50% and 25% respectively:
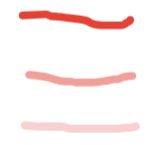
For the purposes of the above example the thickness was set to 7pt.
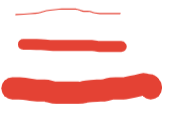
Thickness Setting – this setting determines the thickness in points for the annotations made using this tool. The following examples highlight the impact of the setting.
The thickness used is 1pt, 10pt and 20pt respectively:
Text Mark-up Tools  
The text tools enables the user to select from a number of markup tools that can be applied to text in the document, this includes the following options:

The icon displayed in the toolbar for the markup tool will be the last tool applied by the end user and accordingly the icon in the toolbar shown for the user may be different to that displayed above.
For devices with a touch screen, remember to select either the pan or select option to disable the annotation tool to enable you to swipe on the screen to continue navigating through the document:

Highlighting

The 4 most recent colours are available to the end user to select from and similar to the free hand tool discussed above by clicking or tapping on the  sub menu icon the user is able to select from the colour palette:
Strike Through Tools  
As part of the suite of options available under the Markup options are the underline or strike through tools. The options include:
 - Underline Option
 - Underline with squiggly line
 - Strike Thru
Shape Tools  
Selecting the shape tools enables the end user to apply a range of shapes to the document.
The icon displayed in the toolbar for the shape tool will be the last shape applied by the end user and accordingly the icon shown for the user may be different to that displayed above.
When the preferred tool is selected the user is able to access the formatting submenu as previously discussed by using the arrow in the bottom right of the tool icon. Depending upon the shape selected the user has the ability to select the colour, thickness and opacity. In addition, for the drawing shapes (circle, square etc) the user is able to set the border and fill settings:
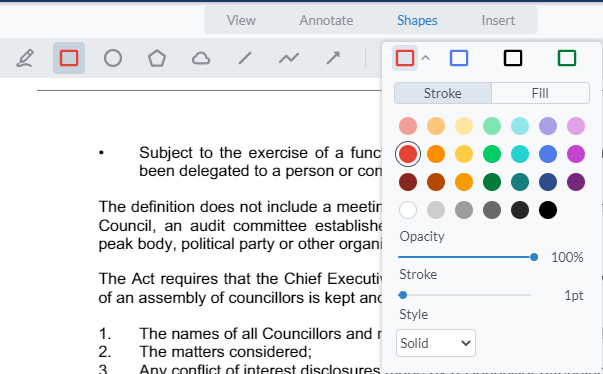
The selected setting is shown with the line underneath it in this case it is the border  .
.
To change it to the fill colour simply select the fill icon and any settings made thereafter will be applied to the fill:

Signature Tool  
This option enables the end user to apply a free hand signature to the document and when it is selected the user is required to select the location on the page for the signature to be applied and once done the following input screen is presented to the user:
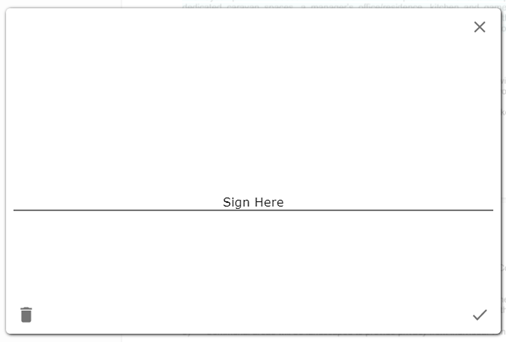
Apply your signature in the space provided and to accept it click on the Tick icon in the bottom right, or to delete it click on the bin icon in the bottom left of the input screen.
Free Text Input  
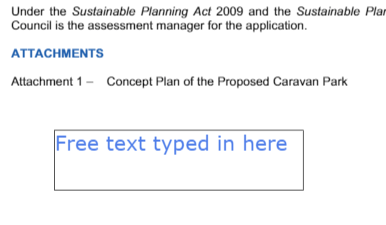
The free text input tool enables the user to type directly onto the page. When this tool is selected the user is required to select the location on the page to add the text and is then able to type directly onto the page:
Notes  
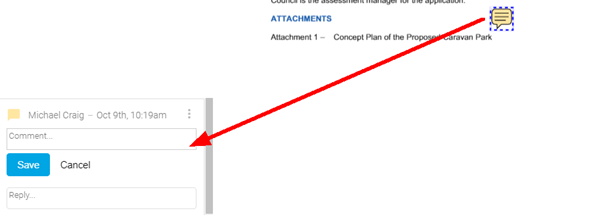
Similar to the free text tool, when this is selected the user is required to select the location on the page to apply the note tool. Once that is done they use is able to type the note into the Notation sidebar on the left of the page:
The following tools may be accessed by clicking on the three dots to the right of the available annotation tools –

The tools available from this menu will be those tools not frequently selected by the end user so the actual tools available may from this selection may vary from user to user, however, for the purposes of this document it is assumed it’s the following two options:
Callout  
The callout tool enables the user to add free text to the page in a call out text box as shown below:
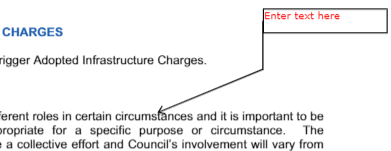
To apply the call out tool the user is required to select the starting point (arrow) is located, draw a line out for the first angle and click, draw the second line out and click which will then locate where the text box will be positioned – the following details the clicks (or taps) required to draw the callout box:
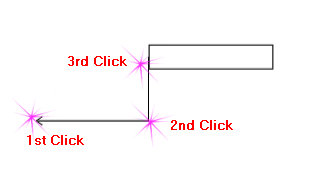
Once the text box is located, the user is then able to enter the required text.
Image  
The image tool enables the user to apply a image from an from the device onto the page. When this tool is selected the user is required to locate where on the page the image is to be inserted and is then able to browse for the image on the device.
Editing Existing Annotations
Annotations once made on a document can be edited by the user by clicking or tapping on them to select them. Once an existing annotation is selected, the edit toolbox is made available to the end user as shown below:
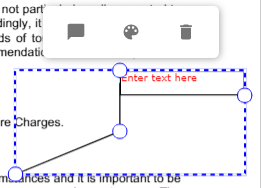
In this instance I have selected the callout annotation and once it is selected note the edit toolbox appears at the top of the annotation enabling me to:
 - Add Comments
 - Edit Formatting
 - Delete Annotation
In addition to the above, the user is able to move the annotation around the page to re-locate it if necessary. When the Add comments feature is selected, the Document Panel will be made active and the user able to enter the annotations directly into that panel. With the Formatting option, depending upon the annotation tool been modified, the options may include:
- Font – size, colour
- Border – thickness, colour
- Fill – Colour
- Opacity