Working with Documents
The documents panel is shown in the middle of the screen and enables you to add and remove documents as well as manage the individual settings for the document as required.
Adding a new Document
When you select a folder that has documents assigned to it they are displayed in the middle panel of the screen. To add a new document you need to click on the Add icon.

Once you click on the  the screen changes to give us this section here which you can use to add documents:

The simplest way to add files is to drag them in and drop into the drop zone area on the page. Alternatively you can add files by clicking the  button and using the browse feature to locate and select the file/s that you want to upload.
When you have documents ready to be added to the system prior to uploading the documents to the server you have the option to replace an existing file and/or convert the file to a PDF. To replace an existing document you must have it highlighted in the list of documents as shown below:
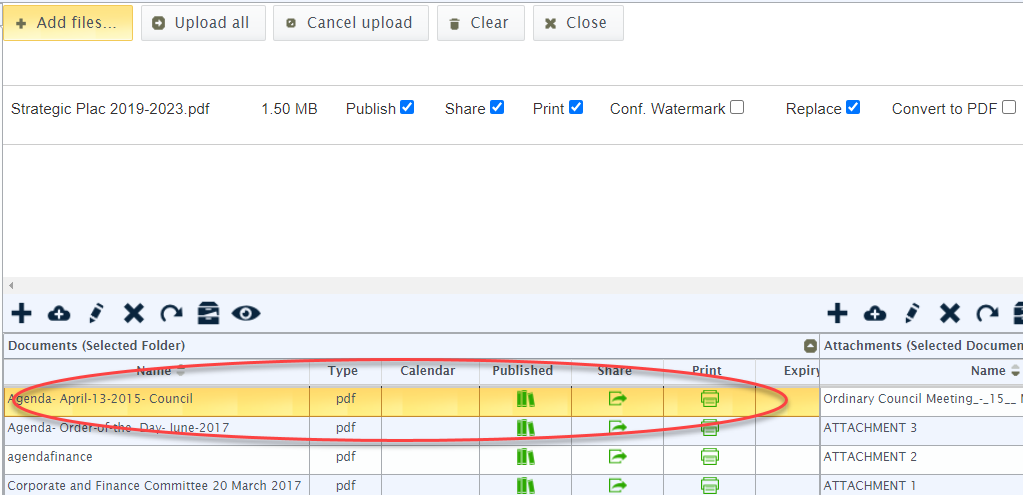
Once you are ready to upload a document you can click on either the  button or
upload individual documents by clicking on the  button alongside the individual documents available in the drop zone area.
A progress bar is displayed is displayed as the document are uploaded to the server. With the convert to PDF option the system will automatically convert the document for you, if the document is of a type that can’t be converted it simply gets uploaded in its native format.
As the documents are uploaded they will be displayed down in the documents panel. If the containing folder has the notifications setting turned on and is set to publish documents immediately then a notification will be sent to the end users to alert them to the fact that new documents have been posted.
Editing a Document
Once a document has been uploaded you can then edit it using the  icon – In editing a document you can modify the items shown below (calendar entry options are discussed in the next section):

By default the settings for the document will be inherited from the folder level but you can also override it at this level if needed. If you edit a setting at the folder level and documents already exist within that folder they do not automatically get updated with the new setting. You still need to make that adjustment here at the document level. The folder setting will only be applied to new documents added to the system not the existing ones.
Calendar Entry
An option is available to enable you to edit a document once it is uploaded to create a calendar entry which will be added to the users default calendar on their tablet when they next synchronise Docs On Tap. To create an event select a document and edit it via the Web Portal:
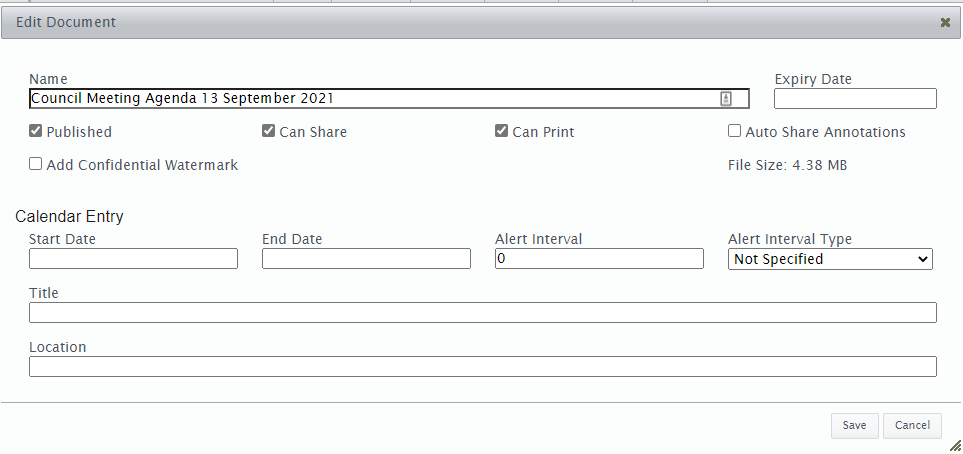
As you can see above you can create a Start and if required End date for the event, description of the event (Calendar Title) and location. In addition you can set an alert for the event by entering a value in the interval field and then select from the interval type option to specify if the interval value is in minutes, hours or days.
When you select the Start and End date fields you will be given a calendar chooser as shown below:
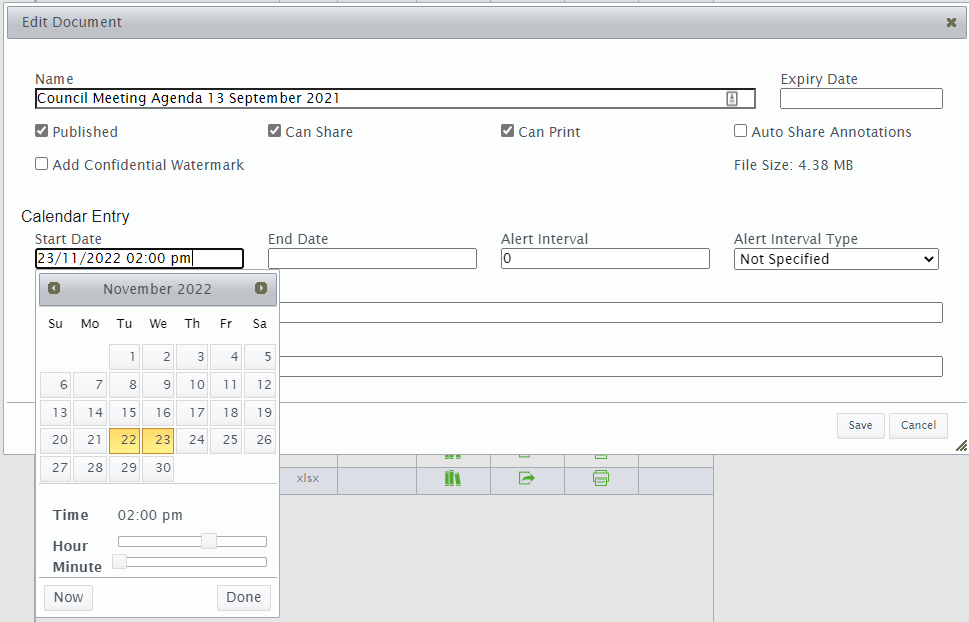
In the following screen shot an alert has been set for 2 hours before the scheduled event:
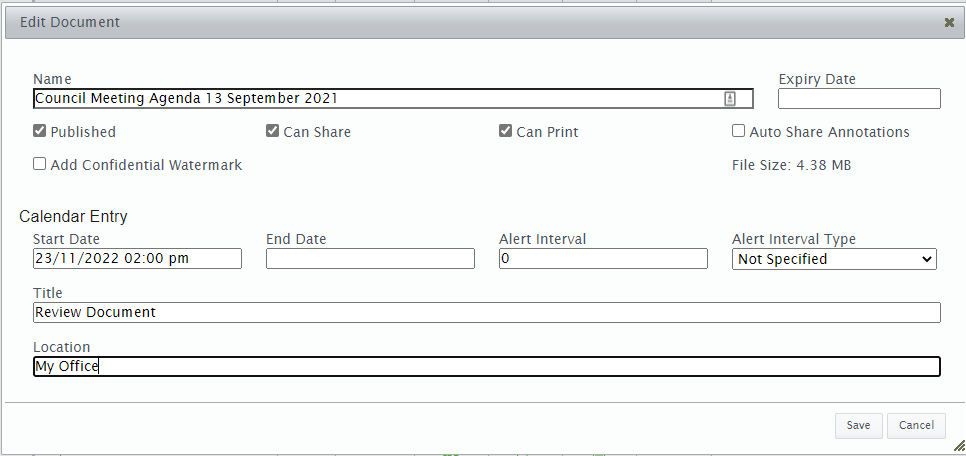
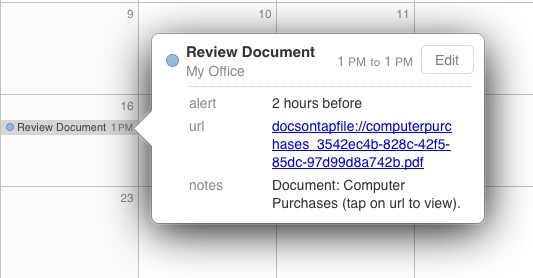
Once the calendar entry is made by Docs On Tap for the end user the calendar will manage the alert process if this has been set. When the alert is generated if the end user opens up the calendar event (or even directly from within the Calendar) the event will contain a hyperlink that if you tap on it and select the link, it will launch Docs On Tap and take the end user directly to the document to which the calendar event relates.
The hyperlink will appear similar to the screenshot below:
Expiry Date for Documents
An option is also available for you to edit a document once it is uploaded to nominate an expiry (or end) date for the document.
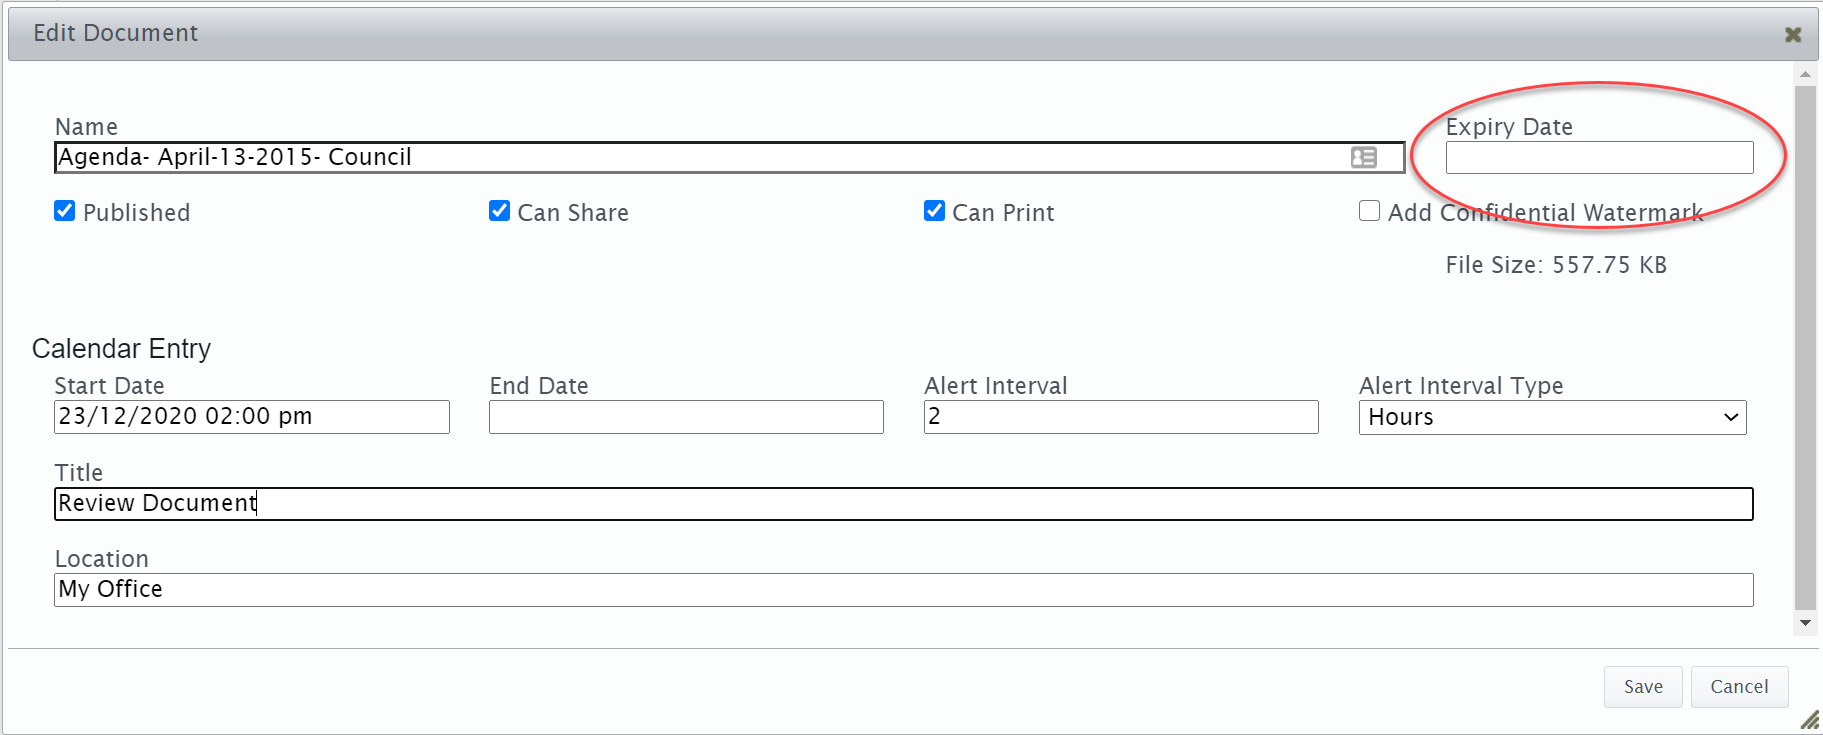
After the expiry date and time have passed the document or attachment will no longer appear on the tablet device. To set an expiry date on a document you need to edit the document once it is uploaded onto the system and click in the Expiry Date field shown highlighted below.
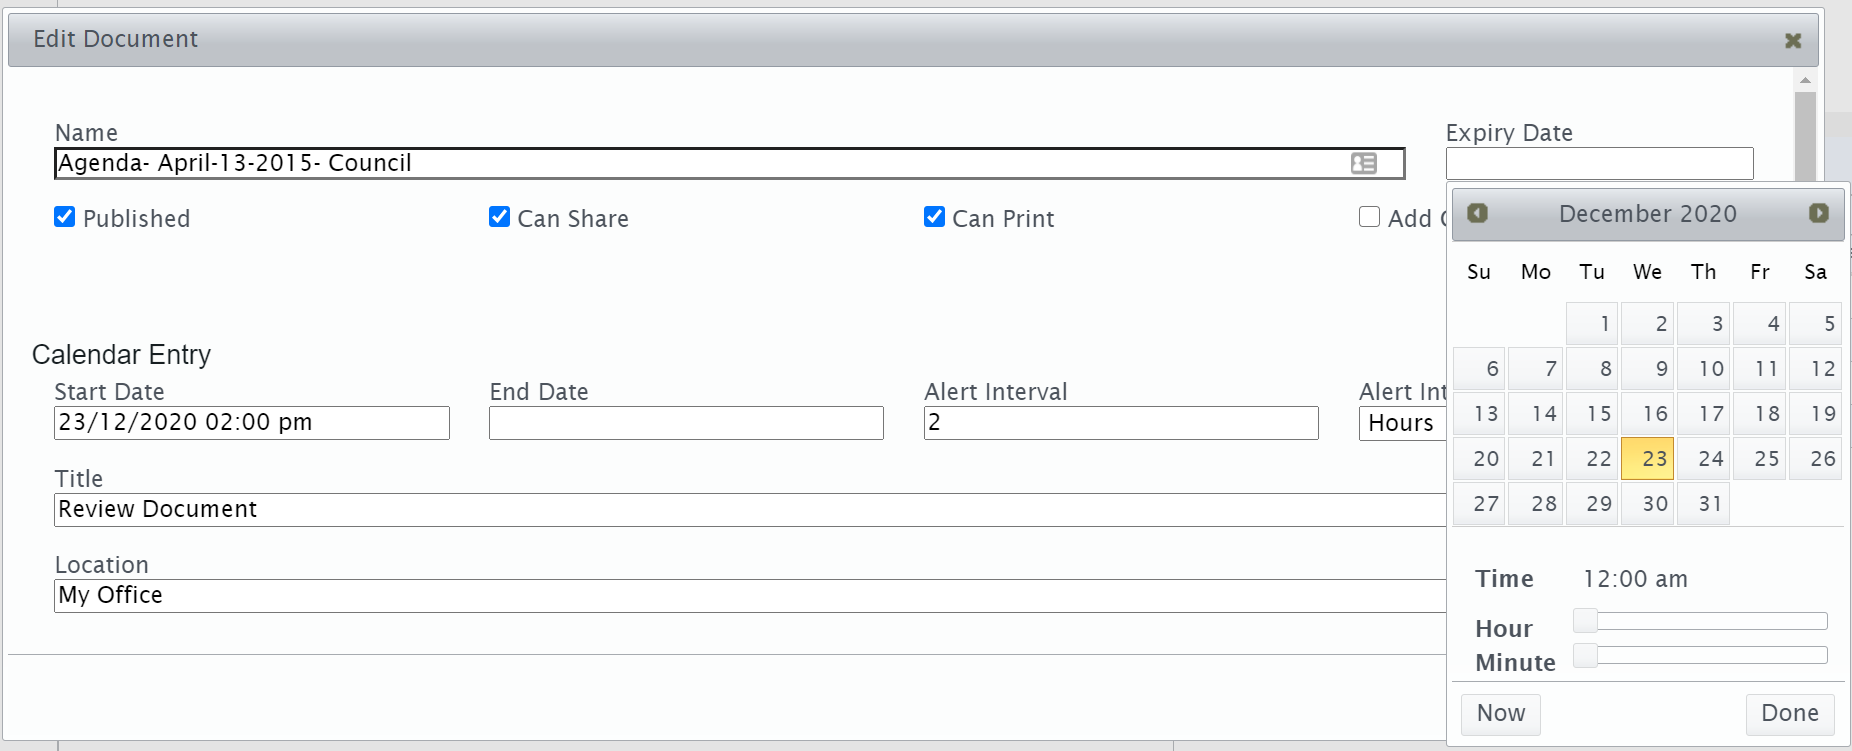
Note that not only can you set the expiry date but the exact time as well for the document to expire on the tablet device. Once the expiry date/time has passed the document will no longer appear on the tablet device.
Deleting a Document
Deleting a document requires you to select the document that you want to remove and then click on the delete icon -  .
.
Any document that is marked as deleted will be physically deleted from the end users iPad next time that they synchronise Docs On Tap. On the the hosted server though the document is just marked as deleted but not physically removed. This feature then enables the option to restore deleted files described in the next section.
Restore Deleted Documents
If you have deleted a document you are able to restore it using these two options – firstly you need to display deleted documents by clicking on the  icon, once they are redisplayed you can then select a document and click on the restore icon -
  which will then make the document active again and hence it will be available to the end users. A notification is not generated when you restore a document, they are only generated for new or replaced documents.
Documents Viewer
From within the Documents tab an option is provided as shown highlighted below to enable you to view the uploaded document:

Available for both Documents and Attachments by clicking on the  icon the document will be downloaded and displayed. How the browser displays the document will depend upon the document type and your browser settings. A PDF document for example will be downloaded and typically displayed within the browser whereas a word document will be downloaded and displayed within Microsoft Word.
Any changes made to a document when it is downloaded will not modify the contents of the document that has been uploaded into Docs On Tap. If the document is modified once it is downloaded then it will need to be loaded back into Docs On Tap using the normal upload methodology provided within the Web Portal.
Drag and Drop Moving of Documents
Documents can be moved to a new folder by clicking and dragging the document to the required new folder and then releasing the mouse button. The application will ask you to confirm the document movement.